
In this tutorial we will show you how to install the Stock Android 4.3 Firmware on your Samsung Galaxy S3. The Firmware we use in this Tutorial has a Vodafone branding (Germany) and also removes your Root-Rights. To install this Custom Firmware you wont need Root or a Bootloader Unlock, we will just use ODIN. Before you start with this tutorial check the Firmware Details to find out if this firmware really is for your device.
[tabs tab1=“Firmware Details“][tab id=1]Model: GT-I9300
Country: Germany (Vodafone)
Version: Android 4.3
PDA: I9300XXUGMJ9
CSC: I9300VFGGMJ5
Datum: November 2013[/tab][/tabs]
Samsung Galaxy S3 I9300 Android 4.3 Stock Firmware
Backup Tutorials
Google automatically saves your contacts but doesn’t sync other files on your device. Check the following tutorials to completely backup your device.
- Backup Apps, Pictures and Ringtones from your Android Device
- Android SMS Backup & Restore Tutorial
- Backup Android Call Logs with Call Logs Backup & Restore
Samsung Galaxy S3 Android 4.3
Was wir benötigen
[checklist]
[/checklist]
Attention: After you install this Stock Firmware your Samsung Galaxy S3 will not be rooted anymore. To find out how to root your Samsung Galaxy S3 with Android 4.3 check out it tutorial: Samsung Galaxy S3 Android 4.3 Root Tutorial
Important Informations
- Always use a USB-Port from the backside of your PC
- Always use the original USB cable
- Always use a fully charged device
- Always Backup your Device first
Supported Operating Systems
- Windows XP
- Windows Vista
- Windows 7
- Windows 8
Samsung Galaxy S3 Android 4.3 Install Tutorial
- Download the USB-Drivers for your Samsung Galaxy S3 and install them on your pc
- Download ODIN and the Firmware file
- Power off your Samsung Galaxy S3
- Power on your device while holding Volume Down + Home-Button until you see the Android symbol with a yellow triangle. To enter the Download-Mode simply press the Power Button once
- Connect your S3 via usb to your pc
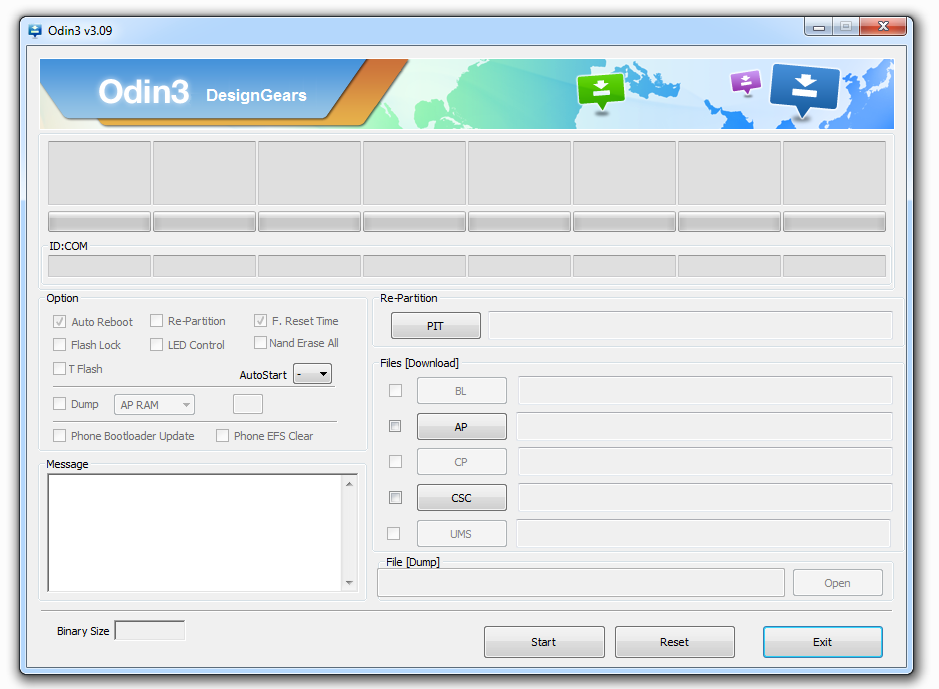
- Launch ODIN and wait until one of the ID:COM fields changes to yellow indicating that ODIN found your phone
- Extract the Contents of the Firmware file and select them in ODIN as follows:
- Click on the „PDA“ Button and select the File with „CODE“ in the name
- Click on the „PHONE“ Button and select the file with „MODEM“ in the name
- Click on The „CSC“ Button and select the file with „CSC“ in the name
- Click on the „PIT“ Button and select the file with the extension .pit
- Check if under „Option“ „Auto Reboot“ and „F.Reset Time“ are checked, if not check them now
- To start the installation click on the „Start“ Button
- Your device should reboot now and boot into Android 4.3