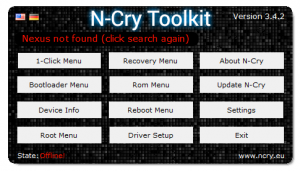
In this article we will go over the different methods for rooting your Google Nexus 4. Users that run Windows 7 or Windows 8 can use the N-Crypt Toolkit which provides the easiest way for rooting your Nexus 4. Mac and Linux Users will need different tools.
[highlight color=“eg. yellow, black“]Always remember to backup your device![/highlight]
Backup Tutorials
Google automatically saves your contacts but doesn’t sync other files on your device. Check the following tutorials to completely backup your device.
- Backup Apps, Pictures and Ringtones from your Android Device
- Android SMS Backup & Restore Tutorial
- Backup Android Call Logs with Call Logs Backup & Restore
Google Nexus 4 Android 4.3 Root How to Windows
Things you will need
[checklist]
[/checklist]
Important Informations
- Always use a USB-Port from the backside of your PC
- Always use the original USB cable
- Always use a fully charged device
Supported Operating Systems
- Windows 7
- Windows 8
Installing USB ADB Drivers on Windows 8
- Install the USB ADV Drivers
- Open a Command Window as Admin-User
- Type in the following commands and press enter after every line:
- bcdedit.exe -set loadoptions DDISABLE_INTEGRITY_CHECKS
- bcdedit.exe -set TESTSIGNING ON
- Now restart your PC
- Wait for the driver installation to finish
Rooting your Nexus 4 with N-Crypt
 Install the ADB Drivers (if you run Windows 8 read „Installing USB ADB Drivers on Windows 8“
- Install N-Crypt Toolkit but don’t start it just yet
- Take your Nexus 4 and go to Settings -> Developer Options and activate „USB Debuging“. If you cant find „USB Debugging“ go to Settings -> About Phone, scroll to the Bottom and tab seven times on „Build Number“.
- Connect your Nexus 4 with your PC and wait for Windows to install the device
- After the installation is finished check the Task Manager for „ADB.exe“ or „Fastboot.exe“
- If none of the processes are currently running start the N-Crypt Toolkit
- Select „Device Info“ and check if your Device was found and ADB is available, if this is not the case, repeat the above steps.
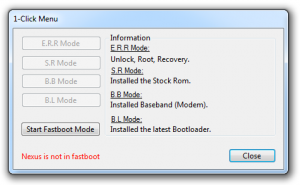
 Select „1-Click-Menu“
- In the 1-Click-Menu window select „Start Fastbookt Mode“
- Your Nexus 4 now reboots into Fastboot
- Now click on E.R.R Mode and follow the onscreen instructions


